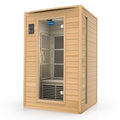
Home Sauna Installation: Plan for Lasting Comfort
Share
A sauna should feel like the easiest part of your recovery routine: step inside, settle into the heat, and leave feeling clear, warm, and restored. That experience begins long before the first session. A thoughtful home sauna installation protects your investment, supports consistent performance, and turns an unused corner of your home into a ritual you will want to keep.
The best installation is not necessarily the largest or most elaborate. It is the one that fits your space, electrical capacity, lifestyle, and preferred sauna experience without adding friction to your day. Start with the room, then make decisions about the sauna itself.
Start With the Right Location
A home sauna belongs where you can use it consistently. For many homeowners, that means a primary bathroom, home gym, recovery room, basement, or a covered outdoor area close to the house. Privacy matters, but so does convenience. A sauna tucked far from a shower, changing area, or water source may look impressive on a floor plan and still get used less often.
Indoor installation offers year-round accessibility and a more integrated wellness-suite feel. A spare bathroom, large walk-in closet, or finished basement can work beautifully when the room has a stable, level floor and room for safe access. Outdoors can be equally compelling, especially if you want fresh air between rounds or plan to pair heat therapy with a cold plunge. The trade-off is greater exposure to weather, more site preparation, and potentially more involved utility routing.
Before you choose a footprint, measure more than the sauna cabin. Leave clearance for the door swing, ventilation, electrical access, and comfortable movement around the unit. Also consider ceiling height. Many sauna models need a relatively low interior ceiling to heat efficiently, while the surrounding room may need enough height to accommodate assembly and service access.
Choose a Sauna That Matches Your Ritual
Your preferred heat experience should guide the installation plan. Traditional saunas use a heater and stones to create high-heat, low-humidity sessions, with the option to add water to the stones for a more enveloping feel. Infrared saunas use radiant heat and generally operate at lower air temperatures, which some people find easier to enjoy for longer sessions. Both can support a restorative at-home routine, but their power requirements, warm-up times, and room conditions differ.
Think honestly about how you will use the space. A compact one- or two-person sauna is ideal for a focused daily reset after training or a demanding workday. A larger cabin makes more sense when sauna time is shared with a partner, family, or friends. Bigger is not automatically better. Extra volume requires more room, more energy, and more time to heat.
A traditional sauna can be the right choice for homeowners who value the classic sensory ritual: natural wood, radiant heat, steam from the stones, and a deeper sense of retreat. Infrared may be the better fit when simplicity, lower operating temperatures, and quick individual sessions are priorities. The right answer depends on the routine you can maintain, not a trend.
Plan Power Before Your Home Sauna Installation
Electrical planning is the detail that can determine which sauna models are realistic for your home. Smaller infrared units may use a standard 120-volt outlet, depending on the model. Many traditional saunas and larger infrared cabins require a dedicated 240-volt circuit. Never assume an existing outlet is adequate simply because it is nearby.
Review the product specifications early and have a licensed electrician assess your panel capacity, circuit requirements, wire routing, and local code requirements. This step should happen before delivery, not after a sauna arrives at your door. If your electrical panel is already near capacity, an upgrade may be necessary, which can affect both timing and budget.
Keep controls and disconnects accessible as required, and do not use extension cords or improvised power solutions. A premium sauna deserves a clean, code-conscious installation that performs as intended session after session.
Build for Moisture, Ventilation, and Longevity
Heat and moisture are part of the sauna experience. Your installation should account for both. Traditional saunas, particularly when water is used on the stones, need thoughtful ventilation and moisture-resistant surrounding finishes. Infrared cabins produce a different environment but still benefit from dry, well-managed placement and adequate air circulation around the exterior.
The sauna itself should sit on a level, stable surface. Tile, sealed concrete, and other durable nonporous floors are practical choices for many indoor settings. If you are installing over a finished floor, protect it from sweat, tracked-in water, and routine cleaning. In basements and other areas prone to humidity, resolve moisture issues before bringing in any wood cabin or electrical equipment.
Ventilation is not about making the room drafty. It is about maintaining fresh air, comfortable heat distribution, and long-term material performance. Follow the manufacturer’s intake and exhaust guidance rather than guessing. Blocking vents to hold more heat can interfere with the sauna’s intended operation and may create an uncomfortable environment.
For a built-in sauna, talk with an experienced contractor about vapor barriers, insulation, wall assembly, drainage, and ventilation. Prefabricated cabins simplify much of this work, but the room around them still deserves careful preparation.
Do Not Forget the Path to the Room
Measure hallways, stairwells, doorways, elevators, and turns before ordering. A sauna may fit perfectly in a basement gym but arrive in panels, crates, or components that require a clear delivery path. If the route is tight, confirm packaging dimensions and assembly requirements in advance.
This is also the moment to decide whether the sauna will be assembled in place, installed by a professional, or positioned on an outdoor pad. A few minutes with a tape measure can prevent a frustrating delivery-day surprise.
Design the Space Around Recovery
A sauna performs best when it is part of a complete transition, not an isolated appliance in a crowded room. Give yourself a place to set a towel, water bottle, and robe. Keep a shower nearby when possible. Choose lighting that helps you shift out of work mode and into recovery mode, such as warm, dimmable fixtures outside the cabin.
Materials matter here. Cedar and other sauna-appropriate woods bring warmth and a refined natural finish, while stone, tile, and matte black accents can create a more architectural recovery-room look. Avoid clutter. The most inviting spaces feel intentional, with only the essentials close at hand.
If you are building a broader wellness zone, leave room for the routines that complement sauna use. A cold plunge, compression session, mobility work, or red light therapy setup can transform a single room into a high-performance recovery destination. Still, protect breathing room between modalities. A space that feels calm is easier to return to.
Set a Realistic Budget and Timeline
The sauna purchase is only one part of the total cost. Your plan may also include electrical work, a concrete or gravel pad, flooring protection, ventilation improvements, finishing work, delivery access, and professional assembly. A plug-in unit placed in a prepared room may be straightforward. A custom indoor build or outdoor traditional sauna with a new electrical run is a larger project.
Build in contingency from the start. Older homes can reveal panel limitations, uneven floors, or hidden moisture concerns once work begins. Addressing those conditions properly is not an inconvenience. It is what gives your sauna a stable foundation for years of use.
Timing also matters. Order only after your location is measured, the electrical path is confirmed, and the room is ready. That sequence keeps your installation composed rather than rushed.
A Better First Session Starts Before Delivery
Once the sauna is installed, follow the manufacturer’s initial-use instructions, allow the cabin to air out, and establish a simple cleaning routine. Wipe benches after use, use clean towels, and keep the interior dry between sessions. Small habits preserve the wood, maintain a fresh environment, and make your next session feel ready rather than like another task.
Your home sauna does not need to imitate a commercial spa to feel exceptional. It needs to suit your real life: the training days that leave you depleted, the evenings when your mind will not settle, and the quiet mornings when you want to begin with strength and balance. Plan the installation with that rhythm in mind, and the space becomes more than a feature of your home. It becomes a place you return to for restoration.