How to Position Red Lights for Better Results
Share
A red light therapy session can be short, calming, and easy to repeat - but placement determines whether your device is actually reaching the area you want to support. Learning how to position red lights is less about finding one perfect setup and more about matching distance, angle, and treatment time to your goal, your device, and the part of your body in front of it.
For a post-workout quad session, that may mean standing squarely in front of a panel. For facial skin support, it may mean sitting comfortably at a measured distance with the light aimed evenly across the face. The best position is one you can hold safely and repeat consistently as part of your recovery ritual.
How to Position Red Lights for the Area You’re Treating
Start by exposing clean, dry skin in the treatment area. Clothing, wraps, and heavy lotions can block or scatter light, so direct exposure is generally the practical choice. Position the red light so it faces the target area as directly as possible. A near-perpendicular angle - where the light shines straight toward the skin rather than grazing across it - helps create more even coverage.
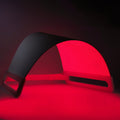
If you are using a full-size red light panel for larger muscle groups, stand, sit, or lie down so the body part is centered in the panel’s treatment field. Treat your back by sitting with your back facing the panel, for example, or place the panel in front of you for chest, shoulders, quads, and shins. Shift your position only when you need to cover a new area.
For a smaller wand or handheld device, keep the treatment head steady over the intended spot. A wand is useful when precision matters: around a knee, elbow, wrist, neck, or a smaller area of the face. Move it slowly between sections instead of waving it continuously. Consistent contact or a consistent short distance helps keep the session even.
The goal is not to treat every inch of your body at once. Give the area you are focused on enough attention, then rotate through other areas on another day or later in the same routine if your device instructions allow it.
Find the Right Distance for Your Device
Distance is where many home sessions become either underpowered or unnecessarily intense. As a general rule, the closer you are to a panel, the stronger the light exposure will be. Moving farther away widens the coverage area but reduces intensity.
Your device manual should be the starting point because output varies widely between panels, masks, wands, and bulbs. Many panel routines are performed from several inches to roughly a foot or more away, depending on the device and the session length recommended by the manufacturer. Do not assume that a closer distance is automatically better. A powerful professional-grade panel may call for more space or a shorter session than a compact device.
Use comfort as a practical checkpoint. Red light therapy should not feel painfully hot. If you notice excessive warmth, skin discomfort, or irritation, increase your distance, shorten the session, or pause use. A small adjustment often makes the experience more comfortable without abandoning the habit.
For facial treatments, position yourself so the entire face receives relatively even exposure. Sitting too close to one side of a large panel can create uneven coverage, especially around the temples and jawline. Center your face, keep it relaxed, and avoid repeatedly turning toward the light unless you are intentionally treating the sides of the face.
A simple way to choose your starting position
Begin with the device’s suggested distance and the lower end of its recommended treatment time. Repeat that setup for a week or two before changing multiple variables. This gives you a clearer sense of what fits your skin, your schedule, and your recovery needs.
If you want broader treatment coverage, step back slightly rather than trying to angle your body into awkward positions. If you want to focus on a smaller muscle or joint, move closer only within the manufacturer’s guidelines. Better positioning should feel composed and repeatable, not like a complicated biohacking experiment.
Set the Angle Before You Start the Timer
A straight-on angle is usually the most efficient. Position the panel at the height of the area you are treating, then adjust your chair, stance, or bench rather than craning your neck or twisting your torso to meet the light.
For the upper body, a panel placed at chest-to-shoulder height works well when seated or standing. For lower-body recovery, lower the panel or use a stable adjustable stand so the light meets your quads, knees, calves, or feet directly. For the back, turn around and keep your spine comfortably neutral rather than leaning forward for the entire session.
Angles matter more when you are treating curved areas. Your shoulders, knees, and sides of the face will not receive the same exposure as a flat surface when you stay completely still. Treat one angle, then make a deliberate small turn to address the next section. For example, face forward for your chest and front shoulders, then rotate slightly left and right if you want additional coverage along the outer shoulder.
Avoid balancing a device precariously on furniture or holding a larger panel during a session. A secure stand, wall mount, or stable surface makes better positioning possible and turns treatment into a restorative pause rather than another task demanding your attention.
Match Positioning to Your Wellness Goal
There is no single setup for every use case. Positioning should support the area and outcome that matter most that day.
After training, many people use red light therapy around the muscle groups they worked hardest. Place the panel in front of your legs after a lower-body session, or position it behind you for your glutes and back. Keep the setup simple enough that you will use it after the workouts that count.
For a soothing evening ritual, a comfortable seated facial session may be the better fit. Position the light at face level, use the manufacturer-recommended eye protection or guidance, and let the session become a quiet transition out of work mode. If bright light feels stimulating close to bedtime, consider moving the session earlier in the evening and see what feels best for you.
For targeted areas such as a stiff elbow, overworked knee, or sore wrist, a wand or compact panel can be easier to place than a large unit. Focus directly on the area, maintain the recommended distance, and resist the urge to extend the session simply because the target is small. Consistency generally matters more than chasing a longer exposure.
Common Positioning Mistakes to Avoid
A few small errors can make a premium device feel less effective than it should. Keep these in mind as you build your routine:
- Standing too far away from a panel without adjusting treatment time according to the device instructions.
- Treating through thick clothing, braces, or heavily covered skin when direct skin exposure is practical.
- Placing the panel too low or too high, forcing an awkward posture that you cannot maintain comfortably.
- Changing distance, angle, time, and frequency all at once, which makes it difficult to find a routine that works for you.
Build a Setup You’ll Actually Use
The most effective position is often the one built into your home. Place your panel where recovery already happens: near a workout space, beside a stretching mat, or in a quiet corner where you wind down. Keep a chair, timer, and eyewear nearby so there is little friction between finishing your workout and starting your session.
For a full-body panel, mark your preferred standing or chair position once you have found a comfortable distance. For a handheld device, use the same chair or mirror each time to make facial or joint-focused sessions easy to repeat. This level of simplicity is part of the luxury of at-home wellness: serious recovery support, available on your schedule.
Let your body and routine guide the final details. Position the light directly, use the distance and session length recommended for your device, and choose a setup that feels calm enough to return to tomorrow. A thoughtful red light ritual does not need to be complicated to earn a lasting place in your recovery routine.